[ad_1]
Mastering simple home maintenance tasks can significantly enhance your daily convenience and security in today’s fast-paced world. One such skill is programming your garage door opener, which some homeowners can find daunting.
Our quick guide is here to change that perception. We’ve distilled the process into easy-to-follow steps, ensuring you can program your garage door opener easily and confidently. Whether setting up a new system or reprogramming an existing one, our guide covers all the essentials, tailored to suit both novices and seasoned DIY enthusiasts. With our expert guidance, get ready to transform a seemingly complex task into a straightforward, do-it-yourself project.
Identifying the Need for Programming Your Garage Door Opener
Determining when your garage door opener requires reprogramming can be straightforward. A clear sign is when your remote ceases to respond. However, before embarking on reprogramming, it’s essential to rule out other issues.
Firstly, check if the garage door opener unit is in its locked state, verify that it’s plugged in, and ensure the garage door opener remote batteries are functional. Battery replacement in a garage door remote control is infrequent, so it’s easy to overlook this simple fix.
Moreover, certain symptoms may point to more significant problems beyond programming needs. For example, if your garage door doesn’t operate with the wall control, this could indicate damage to the opener. Additionally, a delayed response after pressing the open button might signal a more serious issue with the unit.
In such scenarios, it’s crucial to seek professional assistance promptly. A qualified technician can accurately diagnose and resolve these problems, helping you avoid further damage and ensuring the longevity of your garage door opener.
Programming Your Garage Door Opener: A Step-by-Step Guide

Programming your garage door opener is a task most homeowners can manage, though the process may vary slightly across different brands. This guide focuses on three popular brands, LiftMaster, Chamberlain, and Genie, providing general steps applicable to these garage door openers.
Step 1: Verify Remote and Opener Compatibility
Ensure that your new remote matches the brand of your garage door opener. Compatibility is key, as different brands operate on unique frequencies and use distinct communication protocols.
Step 2: Finding the ‘Learn’ Button
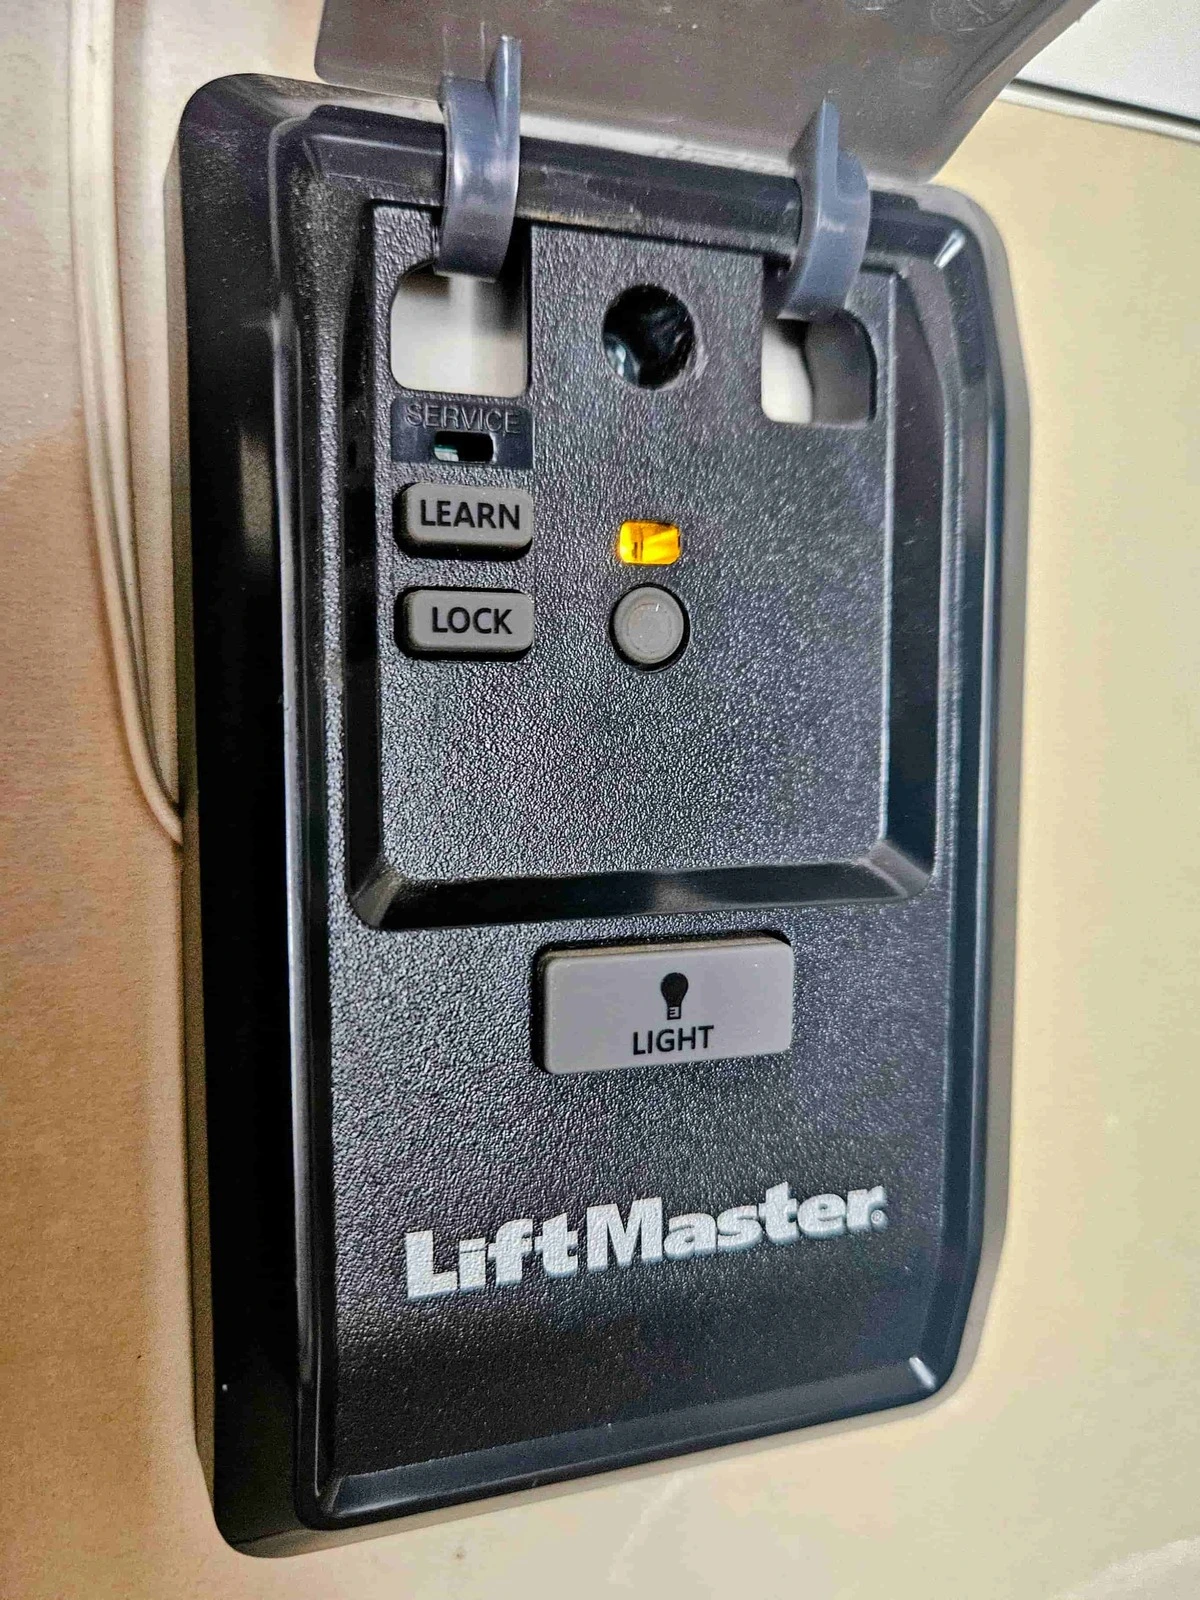
Locate the ‘Learn’ button on your garage door opener. This button can sometimes be elusive. If your garage has a wall control, start there, as the ‘Learn’ button is often found on both the remote and the wall unit. If it’s not visible, inspect the wall unit’s light cover, as it might be concealed inside.
Once located, press the ‘Learn’ button until the indicator light begins to flash, then release the Learn button. You’ll need to press this button twice for LiftMaster models with a “myQ” smart home control panel.
Step 3: Pairing with the Remote
Quickly, within about 30 seconds of activating the ‘Learn’ button, press the ‘Open’ button on your garage door remote. This time frame is crucial for a successful pairing.
Step 4: Finalizing and Testing
Wait for approximately one minute after pressing the ‘Open’ button on the remote to allow the programming to complete. Then, test the remote by pressing the ‘Open’ button again.
If the garage door responds correctly, congratulations, you’ve successfully programmed your garage door remote. For assurance, open and close the door several times to confirm the programming’s effectiveness.
Troubleshooting Common Issues
Opener Not Responding
If your garage door opener doesn’t respond to programming attempts, start by checking the power source to ensure it’s connected. Next, inspect the remote’s batteries; they may need replacement. If these basics are in order, reset the opener by unplugging it for a minute, then try reprogramming.
For persistent issues, check for signal interference from nearby electronic devices. If these steps don’t resolve the problem, consult the manual for brand-specific troubleshooting or consider seeking professional assistance.
Inconsistent Operation
Inconsistent operation of a garage door opener often stems from signal interference or misaligned sensors. Start by checking for obstacles blocking the sensors at the bottom of the door. Ensure they are clean and properly aligned. If the issue persists, inspect the remote for battery weakness or interference from other wireless devices. Additionally, check the opener’s motor unit for any loose wiring or mechanical issues. Regular maintenance, including lubrication of moving parts, can also prevent erratic behavior.
Remote Control Issues
Resolving issues with garage door opener remote controls often involves a few key steps. Firstly, address battery issues by replacing old batteries, as weak batteries commonly cause remote malfunction.
If the problem persists, consider the remote’s range; ensure you are within the operational distance and there are no obstructions or signal interferences. For reprogramming challenges, refer to the manufacturer’s instructions for your model.
If reprogramming doesn’t work, the remote may need resetting or, in some cases, replacement. Regular testing and maintenance of the remote can preempt many of these issues.
Conclusion

Successfully programming your garage door opener involves checking remote compatibility, locating the ‘Learn’ button, pairing it with the remote, and testing the setup. For issues, check power connections, battery health, and sensor alignments.
Phyxter Home Services excels in providing expert guidance and high-quality home maintenance solutions. Our team is dedicated to ensuring your home runs smoothly. For more insights and professional assistance, contact Phyxter Home Services.
Explore our range of informative articles for more DIY tips. Visit our website to see if our services are available in your area and connect with our expertise. Trust Phyxter for reliable, knowledgeable home service solutions.
[ad_2]
Source_link


